• Help Support The Rugby Forum :

OTools for editing .O and .FSH files

Dmitri

Academy Player
Joined
Mar 26, 2021
Messages
23
Country Flag
Ukraine
OTools is a set of tools for importing/exporting EA Sports model format (.o).
OTools provides an ability to convert .O files into 3d-software-friendly file format (GLTF), and also to convert 3d file formats (GLTF, FBX, OBJ etc.) into .O. It also provides additional functionality, such as packing and unpacking .FSH files.

Since version 0.171, an experimental support for EA Rugby games (Rugby 2005; Rugby 06; Rugby 08) was added.
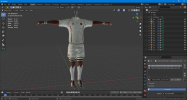
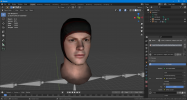
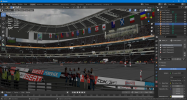
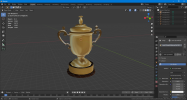
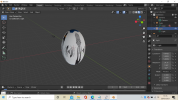
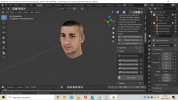
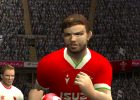
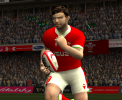
otools_rugby08_1.PNG otools_rugby08_2.PNG otools_rugby08_4.PNG otools_rugby08_6.PNG otools_rugby08_7.PNG

Source code: bitbucket.org/fifam/otools
Downloads: bitbucket.org/fifam/otools/downloads/
Basic guide: bitbucket.org/fifam/otools/wiki/Scene_setup
Editing Rugby series guide: bitbucket.org/fifam/otools/wiki/Editing%20Rugby%20series
 
This awesome! The patch makers will have fun with this. Thank you
 
OTools is a set of tools for importing/exporting EA Sports model format (.o).
OTools provides an ability to convert .O files into 3d-software-friendly file format (GLTF), and also to convert 3d file formats (GLTF, FBX, OBJ etc.) into .O. It also provides additional functionality, such as packing and unpacking .FSH files.

Since version 0.171, an experimental support for EA Rugby games (Rugby 2005; Rugby 06; Rugby 08) was added.
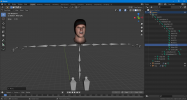
View attachment 10264 View attachment 10265 View attachment 10266 View attachment 10267 View attachment 10268

Source code: bitbucket.org/fifam/otools
Downloads: bitbucket.org/fifam/otools/downloads/
Basic guide: bitbucket.org/fifam/otools/wiki/Scene_setup
Editing Rugby series guide: bitbucket.org/fifam/otools/wiki/Editing%20Rugby%20series

This looks really promising - I was wondering whether there would be any chance on a tutorial/step-by-step guide on the basics?

I've just had a go but I'm struggling with the fundamentals using the GUI to convert - for example I can't successfully convert a head .o model to GLTF and import to blender (also can't do the reverse - when converting a .obj file exported from blender to .o file type I get a invalid mesh/corrupted error message or 'Not a valid .O file!' error message when trying to view the head model in oedit).

Were you able to test any edits to the models in game?
 
First of all you need to find the model you want to edit.
All models in Rugby 08 are stored in data/data.gob file. This is a BIGF file archive, it can be opened with .BIG editors.
Files in data.gob are named with md5-hashes of "real" filenames. So you need to know the exact filename of the file, or make a research and find out what file belongs to what.
For example, the filename for ball model is "misc/ball/Model.o". MD5 hash for "misc/ball/model" is "9dcf2d14b244db5beabd11a5be704f13". Note that all letters are lower-case, forward slashes are used over backslashes, extension is removed.
The filename for ball texture is individual for each team, "kit/teams/<Team Logo Name>.ball.fsh". For New Zealand the filename is "kit/teams/nzl.ball.fsh" and MD5 hash is "b303c958f42152f963c921342d15c896".
When you find model and texture files, put them to some folder.
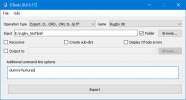
Use OTools GUI to extract .O to .GLTF. Add "-dummyTextures" parameter, so the tool will also generate blank PNG images for all textures which are used by the model.
1.png
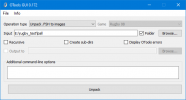
Unpack .FSH to .PNG now. Some, or all blank PNGs will be replaced by "real" textures after this.
1617005193846.png 1617005227682.png
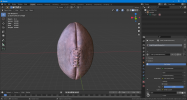
Now open .GLTF in Blender: File > Import > GLTF 2.0. It's recommended to use the latest available Blender version.
The model uses 2 materials (one with bala texture and second with balb texture), both with "IrradLitTexture2x" shader.
1617005425818.png
Now import the new model which will replace the original model.
For example, download and import this model: sketchfab.com/3d-models/old-rugby-ball-806e841289804bffba1c89757582f0ca (it's recommended to download GLTF, but sometimes the source (usually FBX) has more texture maps included).
Here's how it looks after you import it:
1617012388288.png
I will delete all nodes hierarchy which is present there, it's not needed. I will also scale, rotate and move the new model, to look similar to old model. After scaling/rotating/moving, apply all transforms to the mesh (select the new model, Ctrl+A, All Transforms).
1617012487412.png 1617012762310.png 1617012898550.png
Now we need to apply the old material, from old model, to our new model. The old model uses 2 materials, the new one uses only one - so I will use the first material of the old model.
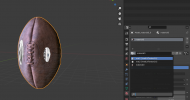
When new model is selected, open materials section and change material to "mat1":
1617013094899.png 1617013144155.png
Now the new model uses the material from old model, and also its texture.
 
Last edited:
Now prepare the texture.
Open the new texture in Photoshop, and resize it to 2048x2048. I don't know if 4096x4096 textures can be used in the game (probably - no), but I think that's too much anway. Maybe even 2048x2048 is too much, but let's use it just for example. After resizing, save the texture as "bala.png" in the folder where you extracted the model and textures.
Note: after changing the texture externally, it will be not updated in Blender. You need an addon for Blender which reloads textures: github.com/samytichadou/Auto_Reload_Blender_addon
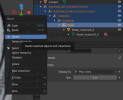
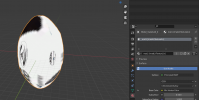
Note: if the texture still didn't update automatically, go to metarial propertiles, Color 1, and Unpack texture:
1617014709429.png
For the "balb" texture, I will replace it with blank 4x4 texture. Maybe it also can be removed, since it's not used by the model. I don't know and don't have a time to check.
1617014823920.png
Now select the old model and delete it. Rename the new model and mesh to "merged". That's how the old model was named.
1617014941793.png
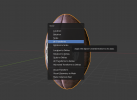
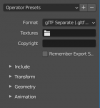
Now export the model to .GLTF. Apply All Transformations again (Select All (A) > Ctrl+A > All Transforms). Then go to File > Export > GLTF 2.0. Select "GLTF Separate" as format.
1617015082309.png
Save to folder where GLTF and PNG were extracted (overwrite the extracted file). You will see a new .bin file (that's how Blender exports to .GLTF - most of data is written to additional .bin file).
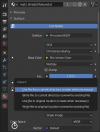
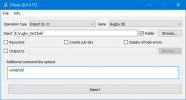
Now import .GLTF and .PNG to .O/.FSH with OTools GUI. Use "-writeFsh" command to pack all referenced textures in the model, into .FSH file.
1617015352794.png
Note: when generating .FSH with "writeFsh" command, the name for new .FSH will be the same as the model (.O) name.
When new files are generated, copy the filename of the old .FSH, and delete the file. Rename the new .FSH with that copied name.
Now you have .O and .FSH which you can import back to data.gob.
Rugby08 16671.png
Note: since you changed the model, and it uses different UV mapping, all other textures (from other .FSH files) will be displayed improperly on this model.
 
Now prepare the texture.
Open the new texture in Photoshop, and resize it to 2048x2048. I don't know if 4096x4096 textures can be used in the game (probably - no), but I think that's too much anway. Maybe even 2048x2048 is too much, but let's use it just for example. After resizing, save the texture as "bala.png" in the folder where you extracted the model and textures.
Note: after changing the texture externally, it will be not updated in Blender. You need an addon for Blender which reloads textures: github.com/samytichadou/Auto_Reload_Blender_addon
Note: if the texture still didn't update automatically, go to metarial propertiles, Color 1, and Unpack texture:
View attachment 10312
For the "balb" texture, I will replace it with blank 4x4 texture. Maybe it also can be removed, since it's not used by the model. I don't know and don't have a time to check.
View attachment 10313
Now select the old model and delete it. Rename the new model and mesh to "merged". That's how the old model was named.
View attachment 10314
Now export the model to .GLTF. Apply All Transformations again (Select All (A) > Ctrl+A > All Transforms). Then go to File > Export > GLTF 2.0. Select "GLTF Separate" as format.
View attachment 10315
Save to folder where GLTF and PNG were extracted (overwrite the extracted file). You will see a new .bin file (that's how Blender exports to .GLTF - most of data is written to additional .bin file).
Now import .GLTF and .PNG to .O/.FSH with OTools GUI. Use "-writeFsh" command to pack all referenced textures in the model, into .FSH file.
View attachment 10316
Note: when generating .FSH with "writeFsh" command, the name for new .FSH will be the same as the model (.O) name.
When new files are generated, copy the filename of the old .FSH, and delete the file. Rename the new .FSH with that copied name.
Now you have .O and .FSH which you can import back to data.gob.
View attachment 10317
Note: since you changed the model, and it uses different UV mapping, all other textures (from other .FSH files) will be displayed improperly on this model.

Amazing - thank you very much for the detailed guide which is incredibly useful!

I've managed to run through the first few steps for now and successfully imported the same example rugby ball you used into blender (using files from my data.gob extract). I'm fairly new to blender (started last weekly basically) so will likely run through these steps at first and then watch some more tutorials on the basics.

Actually really like the old rugby ball so could maybe add that as a easter egg for one of the special teams. Looks like this is a massive improvement on oedit and a load of different customisation possibilities if some people on the forum are/can get good enough at blender/photoshop

I've got some time off so will have a go and see what I can produce - will see if I can produce a couple of new balls and then maybe a custom face design.

One more question I had is do you think this could work with a tool like Facebuilder for blender (https://keentools.io/products/facebuilder-for-blender)? I've had a play round with that and it seems very easy to make fairly realistic faces with just a few photos (example of Jonny May, England attached)

Thanks!
 

Attachments

  • 2021-03-29.png
    2021-03-29.png
    1 MB · Views: 83
  • 2021-03-29 (2).png
    2021-03-29 (2).png
    918.9 KB · Views: 88
Talking about player heads, they are stored in individual .BIG files: "players/heads/<player location id>.big"
Player IDs can be found in "xml/config/playermanager.xml" (MD5: "730eef3fd7726e43de955f21083ab000"). Look for "location" attribute.
View attachment 10318
Leading zeros must be removed: "players/heads/18467.big", MD5 hash is "45c781ccc0c71b873df31f1fed5a831f"
The .BIG file contains "model.o" and "textures.fsh", which must be extracted.
You already know how to extract files, from previous guide. But for head models there's a special thing: they must be extracted with the skeleton (-skeleton "data\skeleton\rugby\head_temp.o").
View attachment 10320 View attachment 10321 View attachment 10322
The "dirt" texture is placed in some other .FSH file, but it's not important.
View attachment 10323
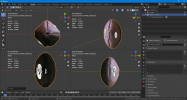
You can see that the model conists of two objects, one for head and another for hair. The first uses "face" texture, and the second - "hair" texture. Both use materials with "LitTexture2IrradSkinSubSurfSpec" shader. You can also see that "dirt1" texture is used in second texture slot ("tex1" attribute in material name). We can guess that a dirt texture is somehow merged with color texture (that all must be defined in shader's logic).
 
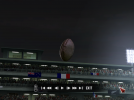
if someone wants to give the ball a view in game, just paste these files in the game's root directory and play a world cup game.

(mega.nz/file/RORWQLKA#iroO1dIoQhVImoiZ3vDxkPxDXLK6fNqvrMPUHWkf-ao)
 
Last edited:
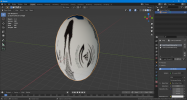
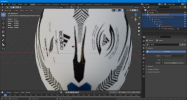
Following these tutorials to mess with player faces I've made my first face: Creepy Leigh Halfpenny!:

preview1.png

I used the Facebuilder blender app to generate Halpenny's head, then morphed the model from in-game around it to get to the above. I've not got the eye bit worked out yet, I've put in a transparent bit on the texture where the eye should be but it's not quitee right atm. Still, not bad for attempt 1.
 
Talking about player heads, they are stored in individual .BIG files: "players/heads/<player location id>.big"
Player IDs can be found in "xml/config/playermanager.xml" (MD5: "730eef3fd7726e43de955f21083ab000"). Look for "location" attribute.
View attachment 10318
Leading zeros must be removed: "players/heads/18467.big", MD5 hash is "45c781ccc0c71b873df31f1fed5a831f"
The .BIG file contains "model.o" and "textures.fsh", which must be extracted.
You already know how to extract files, from previous guide. But for head models there's a special thing: they must be extracted with the skeleton (-skeleton "data\skeleton\rugby\head_temp.o").
View attachment 10320 View attachment 10321 View attachment 10322
The "dirt" texture is placed in some other .FSH file, but it's not important.
View attachment 10323
You can see that the model conists of two objects, one for head and another for hair. The first uses "face" texture, and the second - "hair" texture. Both use materials with "LitTexture2IrradSkinSubSurfSpec" shader. You can also see that "dirt1" texture is used in second texture slot ("tex1" attribute in material name). We can guess that a dirt texture is somehow merged with color texture (that all must be defined in shader's logic).
None of the attachment links work?
 
Following these tutorials to mess with player faces I've made my first face: Creepy Leigh Halfpenny!:

View attachment 10373

I used the Facebuilder blender app to generate Halpenny's head, then morphed the model from in-game around it to get to the above. I've not got the eye bit worked out yet, I've put in a transparent bit on the texture where the eye should be but it's not quitee right atm. Still, not bad for attempt 1.
Nice - I think a few tweaks and that could look really good. Don't have laptop at moment but will have a go at this with few faces I have from face builder soon (Jonny May, Richie Mo'unga and Matthieu Jalibert). Definitely a good first attempt. Let us know if you work out eyes - thought that bit might be tricky to nail (on the template face texture the eye textures are on bottom left). How long did it take to morph the model?
 
Let us know if you work out eyes
Yes all I needed to do was correct the eyes on the bottom-left of the face texture. I'm having to re-learn the basics of blender so it's taken a couple of hours to get to this stage, but it'll probably take about 30 mins - 1 hour to do one from start to finish if you know what to do.
 
Following these tutorials to mess with player faces I've made my first face: Creepy Leigh Halfpenny!:

View attachment 10373

I used the Facebuilder blender app to generate Halpenny's head, then morphed the model from in-game around it to get to the above. I've not got the eye bit worked out yet, I've put in a transparent bit on the texture where the eye should be but it's not quitee right atm. Still, not bad for attempt 1.
@jim546 are you using a modified 08 model or the Facebuilder Model?
 
@jim546 are you using a modified 08 model or the Facebuilder Model?
I'm modifying the Rugby 08 model then re-importing it, I just use the facebuilder model as a guide.

Final photo on this below, I've added a hair texture and fixed the eye texture and the mouth area, it's "good enough" for now. If anyone wants the file it's attached, it replaces the game's Shane Wiliams head, to apply it to Halfpenny you will need to edit his details in Woosah's rugeditor to apply head no. "15460".

preview2.png
 

Attachments

  • Halfpenny head.zip
    97.5 KB · Views: 12
I'm modifying the Rugby 08 model then re-importing it, I just use the facebuilder model as a guide.

Final photo on this below, I've added a hair texture and fixed the eye texture and the mouth area, it's "good enough" for now. If anyone wants the file it's attached, it replaces the game's Shane Wiliams head, to apply it to Halfpenny you will need to edit his details in Woosah's rugeditor to apply head no. "15460".

View attachment 10391

Do you know how i can keep the vertex of the original model? im not sure if this affects the export?
 
Last edited:
You can use completely new model, the only thing you need to transfer from the original model is the "skinning" (vertex connection to skeleton bones). You can also create skinning from scratch, but that's very difficult to do in Blender.
Also, you need to use "-skeletonData none" on import.
Here's my config for import:
Code:
-writeFsh -fshForceAlphaCheck -fshIgnoreTextures dirt -skeletonData none
This will:
create .fsh
correctly select texture format (dxt1 or dxt5)
not include "dirt" texture into .fsh
remove skeleton data from the final model
 
You can use completely new model, the only thing you need to transfer from the original model is the "skinning" (vertex connection to skeleton bones). You can also create skinning from scratch, but that's very difficult to do in Blender.
Also, you need to use "-skeletonData none" on import.
Here's my config for import:
Code:
-writeFsh -fshForceAlphaCheck -fshIgnoreTextures dirt -skeletonData none
This will:
create .fsh
correctly select texture format (dxt1 or dxt5)
not include "dirt" texture into .fsh
remove skeleton data from the final m

thanks for the feedback, other models do look a lot better as I have tried this but I cant keep the vertexes of the original model in blender, how do I do that?
 
Talking about player heads, they are stored in individual .BIG files: "players/heads/<player location id>.big"
Player IDs can be found in "xml/config/playermanager.xml" (MD5: "730eef3fd7726e43de955f21083ab000"). Look for "location" attribute.
View attachment 10318
Leading zeros must be removed: "players/heads/18467.big", MD5 hash is "45c781ccc0c71b873df31f1fed5a831f"
The .BIG file contains "model.o" and "textures.fsh", which must be extracted.
You already know how to extract files, from previous guide. But for head models there's a special thing: they must be extracted with the skeleton (-skeleton "data\skeleton\rugby\head_temp.o").
View attachment 10320 View attachment 10321 View attachment 10322
The "dirt" texture is placed in some other .FSH file, but it's not important.
View attachment 10323
You can see that the model conists of two objects, one for head and another for hair. The first uses "face" texture, and the second - "hair" texture. Both use materials with "LitTexture2IrradSkinSubSurfSpec" shader. You can also see that "dirt1" texture is used in second texture slot ("tex1" attribute in material name). We can guess that a dirt texture is somehow merged with color texture (that all must be defined in shader's logic).

Hi Dmitri,

Is it possible to reupload the attachments for the above? - as Delta mentioned the links on the screenshots seem to not work

I've had a play round and I've managed to get a facebuilder head model in the game but not attached to the body! You mentioned you to extract with skeleton, transfer the original model "skinning" and use "-skeletonData none" on import. Apologies very much a novice so pretty stuck on using this method for head model and/or using new models.

For now probably the best I can do it copy jim's method above of editing the texture fsh/bmp in GIMP and using a facebuilder head as a reference to edit a pre-existing rugby 08 head model but still need to figure out reimport

Will keep having a play around

Thank you
 
I'm modifying the Rugby 08 model then re-importing it, I just use the facebuilder model as a guide.

Final photo on this below, I've added a hair texture and fixed the eye texture and the mouth area, it's "good enough" for now. If anyone wants the file it's attached, it replaces the game's Shane Wiliams head, to apply it to Halfpenny you will need to edit his details in Woosah's rugeditor to apply head no. "15460".

View attachment 10391

What steps did you take you successfully export the head model back out of blender and into rugby 08 and have the head attached properly? - I'm having issues with the head not attaching properly after I try to add it back into the game (even if I try just to get a pre-existing head back in the game after importing to blender and exporting back out)
 
Top